AI-Powered Customer Support For Your WordPress Site
Add Pingu to your WordPress website and give customers instant answers around the clock. Pingu handles routine questions automatically and lets your team step in when a conversation needs human support.
Set Up Pingu on WordPress in 5 Simple Steps
- Step 1
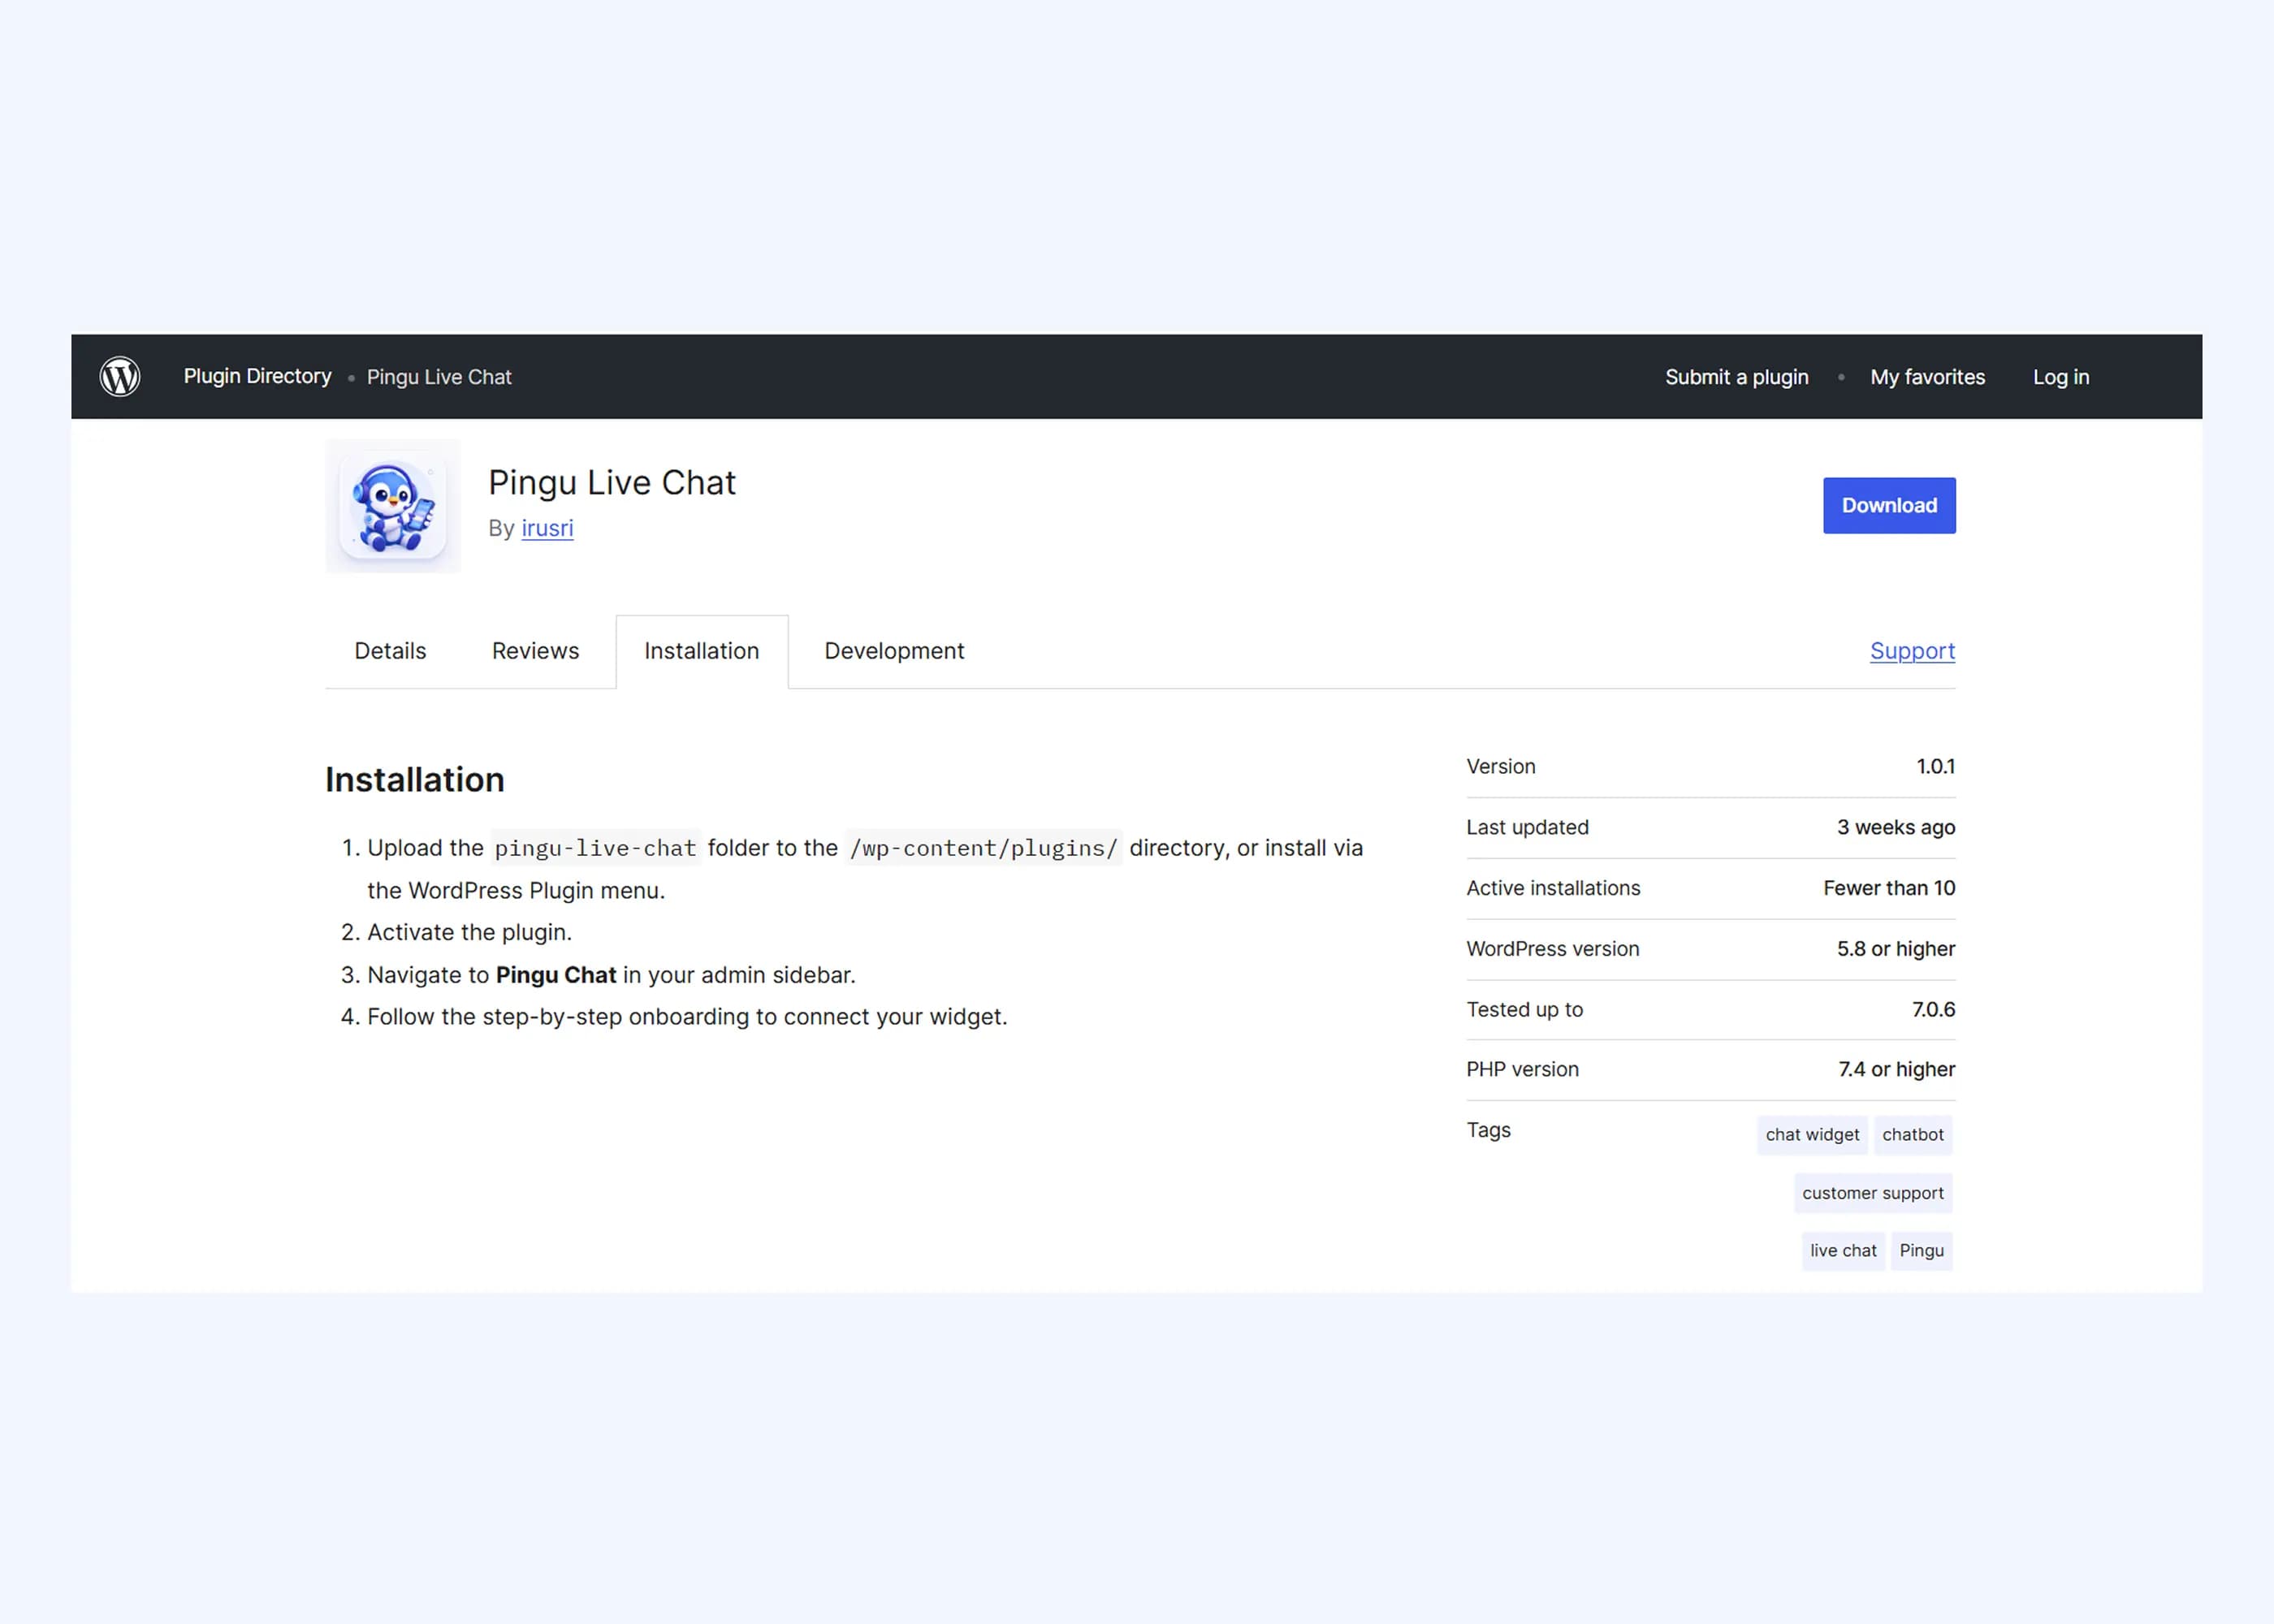
Install and activate the Pingu plugin
Log in to your WordPress admin and add the free Pingu Live Chat plugin from the official WordPress plugin directory.
 Go to Plugins → Add New Plugin in your WordPress dashboard
- Search for “Pingu Live Chat” and click Install Now
- Click Activate — a new Pingu item appears in your admin menu
Prefer a manual install? Download the plugin from wordpress.org and upload the .zip file under Plugins → Add New Plugin → Upload Plugin.
DashboardPostsPluginsAdd New PluginSettingsAdd Plugins
Pingu Live Chat
Pingu Live Chat
AI-powered live chat for WordPress. Answer visitors 24/7 and hand conversations to your team when needed.
By Pingu
Install NowActivate - Step 2
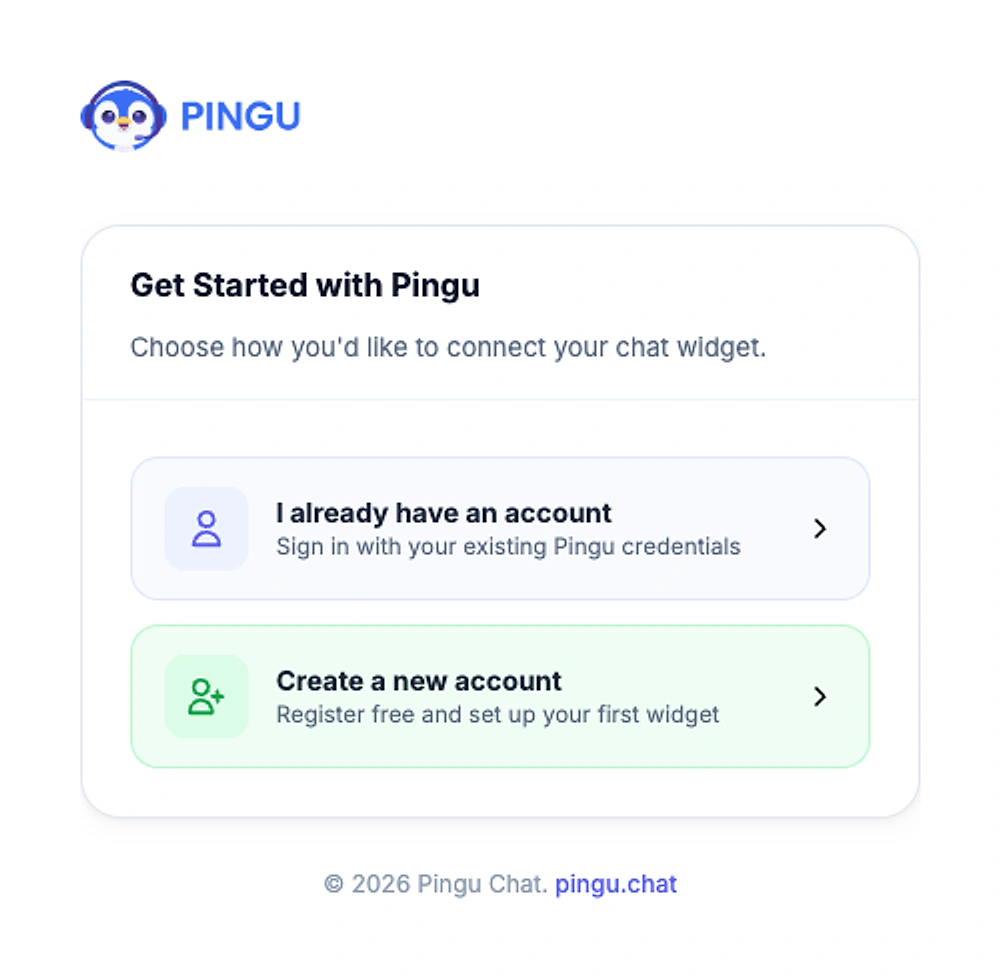
Open Pingu and choose how to connect
Click Pingu in the admin menu to open the setup screen, then choose whether to sign in with an existing account or create a new one.
- Already a Pingu user? Choose “I already have an account”
- New to Pingu? Choose “Create a new account” to register for free and set up your first widget
- Everything happens inside WordPress — no code required
- Step 3
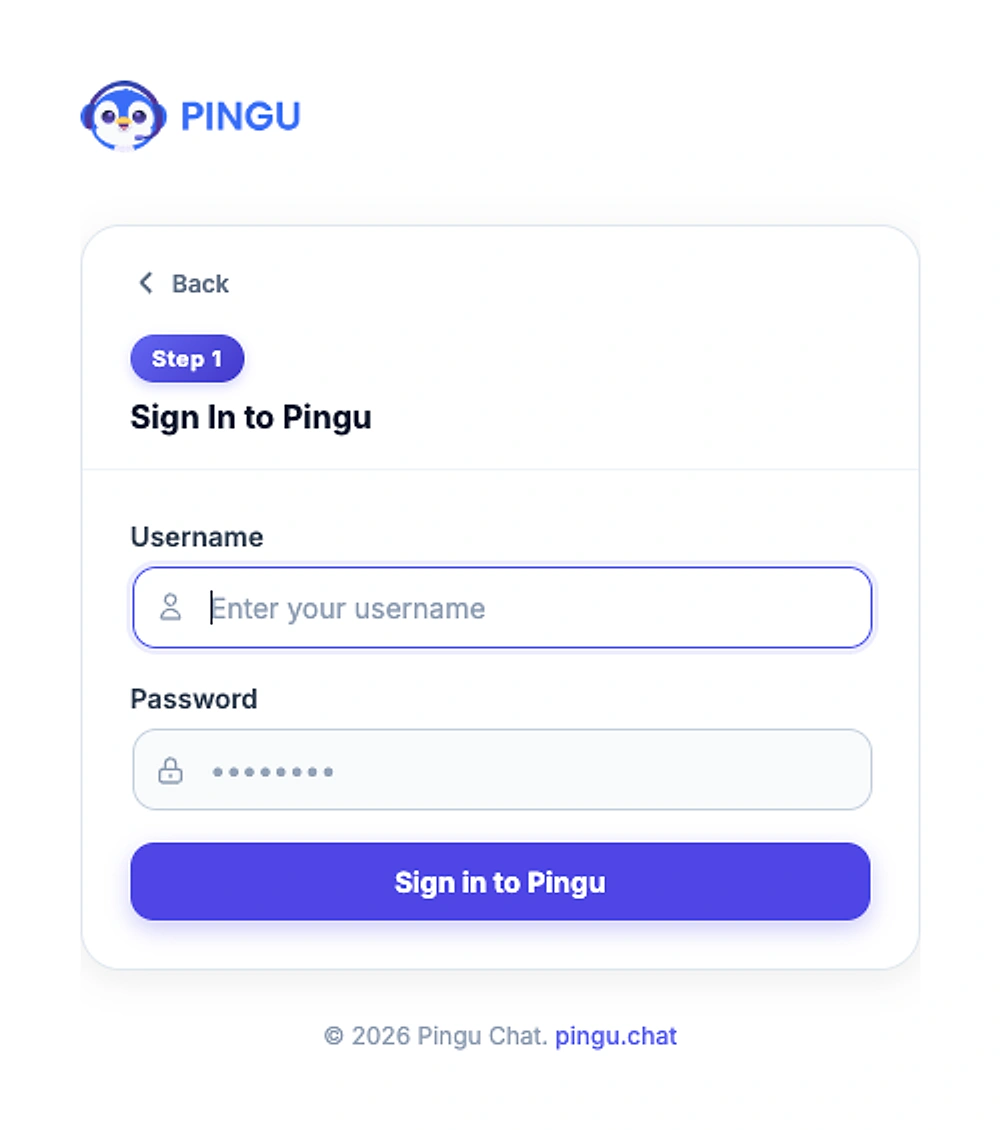
Sign in to your Pingu account
Enter the username and password you use for Pingu and click Sign in to Pingu. The plugin connects securely to your account.
- Use the same login as the Pingu web dashboard and mobile app
- Click Back at any time to return to the previous screen
- Your WordPress site is linked to your account as soon as you sign in
- Step 4
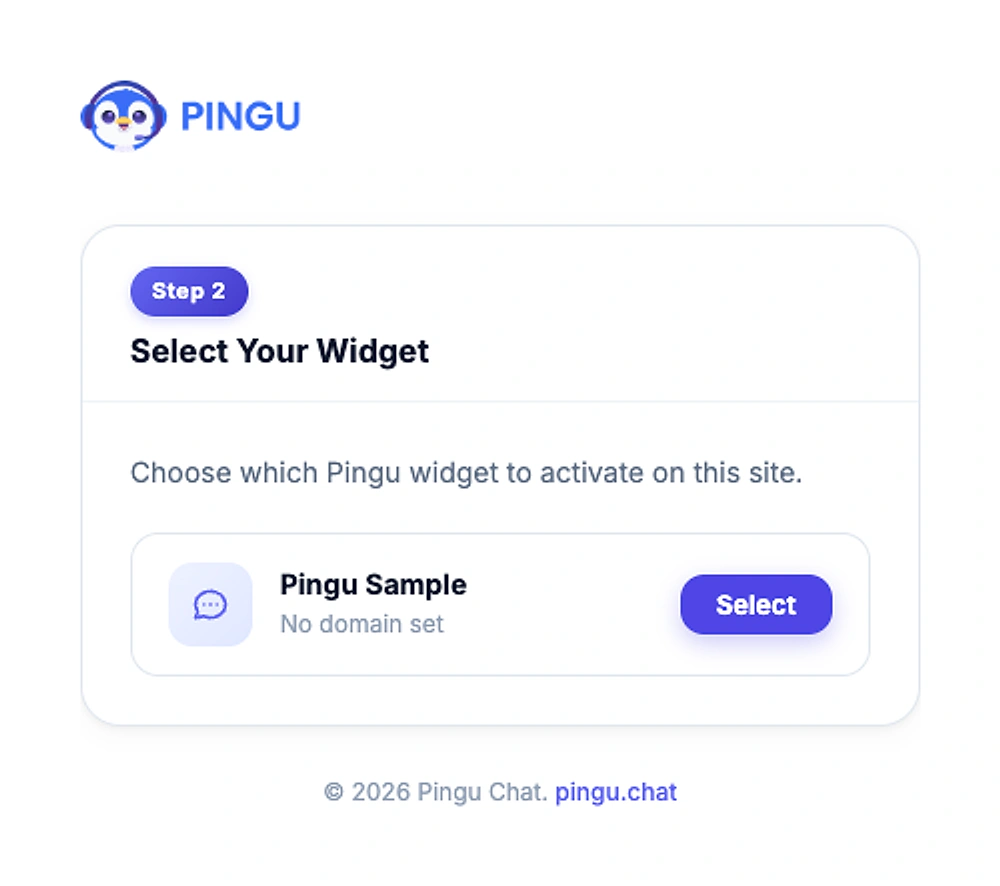
Select the widget for this website
Pingu lists every chat widget in your account. Pick the one you want to show on this WordPress site and click Select.
- Each widget shows its name and the domain it's assigned to
- Running several websites? Create a separate widget for each one
- Every widget can have its own AI assistant, look and knowledge base
Don't see a widget yet? Create one in the Pingu dashboard first, then come back to this screen.
- Step 5
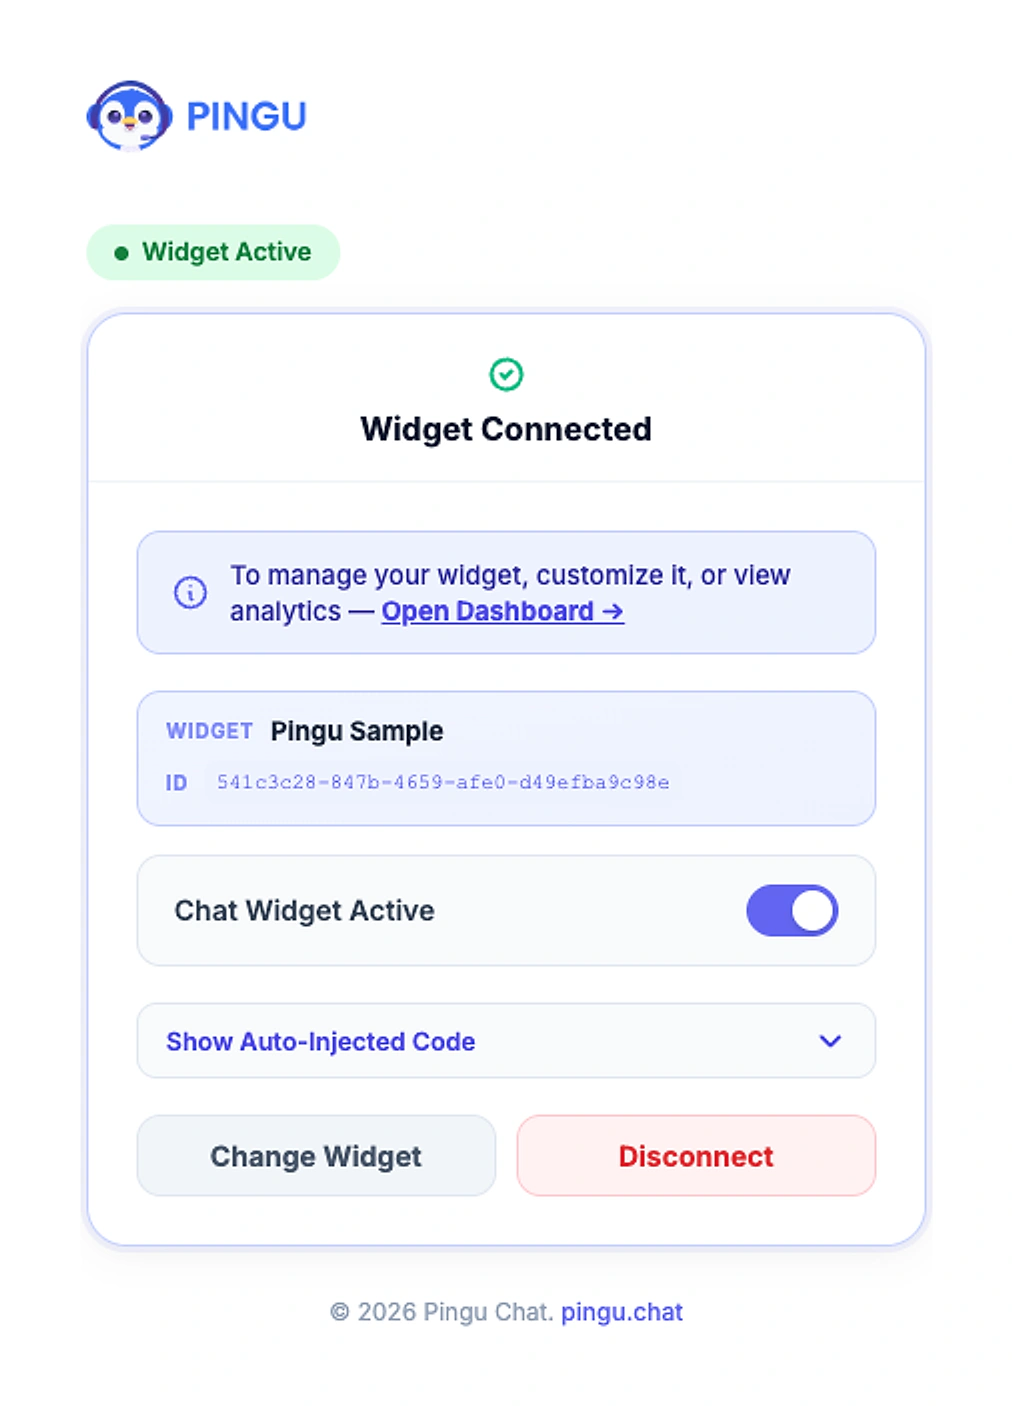
Your chat widget is live
That's it — Pingu automatically adds the widget to every page of your website, so visitors can start chatting right away.
- Switch the widget on or off at any time with the Chat Widget Active toggle
- Expand Show Auto-Injected Code to see the script Pingu adds for you
- Use Change Widget to switch to another widget, or Disconnect to unlink this site
- Click Open Dashboard to customise your widget, train your AI and view analytics
Open your website in a new tab to see the chat bubble. If you use a caching plugin, clear the cache if the widget doesn't appear straight away.
Train Your WordPress Chatbot With Your Business Knowledge
Connect your website content, documents, FAQs, and support information to Pingu so your AI chatbot can provide accurate answers based on your business.
- Train Pingu using your WordPress website content, documents, FAQs, and guides
- Give customers instant answers based on your own business information
- Keep your knowledge base updated as your products, services, and information change
- Use one knowledge source across AI chat and customer-support conversations
Pingu AI Chatbot for WordPress!
Bring AI-powered customer support directly to your WordPress website. Install the Pingu plugin, connect your account, and start helping customers without building a chatbot from scratch.
- Install Pingu directly on your WordPress website
- Connect your Pingu account and activate your chat widget
- Automatically answer common customer questions 24/7
- Let human agents take over conversations whenever needed
- Manage conversations from the Pingu dashboard or mobile app
- Customize the chatbot to match your website and brand
Install. Connect. Start Chatting.
Turn your WordPress website into an always-available customer support channel with Pingu.